Reasons why Pinterest saves me

Please tell me you’ve heard of Pinterest.

If you haven’t, I give you full permission to abandon

reading this blog and go spend some time there!

Though sometimes technology takes over our lives in a bad way,

I really have to say that Pinterest is a lifesaver sometimes.

Here are reasons I love this website:

1. Thousands of recipes on hand for nights I have no clue what to cook!

I’m sure you’ve seen some of the recipes I’ve posted

and all of them have come from somewhere on Pinterest.

Whether I’m looking for a fab dish to bring to a get-together

or something to quickly whip up for dinner after work,

it’s so nice to actually see a picture of what I’ll be making

rather than hoping the recipe will provide something mouth-watering.

This baked potato soup was healthy AND delicious!

2. Planning my weekly wardrobe just got easier.

Let me first start off by saying, I have no fashion sense.

Well, until I discovered all the fashion pins on Pinterest.

For years, I felt like I continuously had nothing to wear

though my closet was bursting with clothes and shoes.

It’s because I never really learned how to shop

in a way that make sense for putting my wardrobe together.

Kind of girly, but I now follow a few fashion blogs

that have seriously flipped my shopping sense upside down.

Before I buy anything now, I find myself thinking,

Do I have at least 2 other things that will go with this?

If not, it’s a no-go.

3. Fitness tips galore!

You may have noticed that I haven’t been blogging about running lately

because I’m trying to rid myself of a stupid injury called Runners Knee.

But in the meantime, I’ve been able to pin inspirational quotes

and other fitness tips to try while I’m not running.

Yesterday I found a great arm workout with dumbbells,

and after that a killer ab workout.

I don’t know about you, but I workout wayyyy more efficently

when someone else makes up the workout

and I can just follow the directions.

4. Teaching ideas from fellow amazing teachers!

One of my favorite parts about Pinterest is that it’s simply pictures of things.

So when I’m looking for an engaging lesson idea

I can search by a topic idea and then browse pictures of lesson ideas.

Anchor charts, art projects, games, workshop centers, and more!

It’s seriously a lifesaver sometimes,

especially when my creative brain has been fried and I need something new.

I used this poster in my class to teach about how to choose a book that is “Just Right” for each student.

I probably could add a few more reasons, but I’ll stop there for now.

This whole idea came to me today

when I was able to throw in a couple of chicken breasts, salsa, and taco seasoning

into the crockpot for a few hours while I did my Sunday errands.

Dinner tonight! Yum!

This shredded chicken recipe for tacos is so easy

and this is probably one of my favorite go-to meals when I need something quick.

I probably would never have tried this recipe in the first place

had the picture not looked so appealing!

Thank you, Pinterest, for being so darn amazing,

and making my life a little easier.

Baking Bliss

I like to savor every last moment of my “freedom.”

School breaks seem to come and go so quickly,

that I always get a little sad when they are about to end.

Baking while listening to some of my favorite Pandora stations

was the perfect itinerary for this lovely Saturday to cure my Back to School blues.

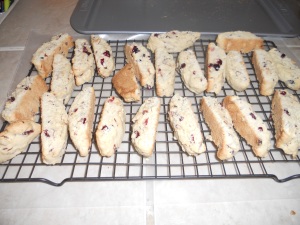
Cranberry Almond Biscotti, with a hint of orange zest

You will need:

1 3/4 cup all purpose flour

1 1/2 tsp baking powder

pinch of salt

3/4 cup slivered almonds

1/3 cup craisins

2 tbsp unsalted butter, softened

3/4 cup sugar

2 eggs

1 tsp vanilla extract

1 tsp orange zest

Here goes nothin’:

1. Preheat oven to 375 degrees.  Line baking sheet with parchment paper.
2. In medium bowl, combine flour, baking powder and salt.

Add craisins and almonds and mix.

3.  In larger bowl, beat sugar and butter for about 1-2 minutes.

Add vanilla, then eggs, one at a time.

Lastly, add the orange zest.

4. Slowly add dry ingredients and mix until a smooth dough forms.

5. Remove dough and form 2 long flat logs about 1 1/2 inches wide

and about 11 inches long.  Add flour if the dough becomes too sticky to work with.

6. Bake for about 20-25 minutes.  Cool until able to handle.

7.  Using a serrated knife, carefully cut 1/2 inch slices at an angle.

Place each slice face up on the baking sheet.

8.  Bake for another 4 minutes, then flip each cookie to the other side.

Bake for another 4 minutes.  Let cool.

I have to admit, the few times I’ve made biscotti

I’ve been with my mom, and these just weren’t the same.

However, they are just as addicting!!!

I recommend bringing some to friends, family, neighbors, coworkers, whoever!

I will admit I’ve already had one too many today myself.

One more day of “freedom.”

Sigh, I promise I do love my job.

But these breaks from school really are pretty amazing.

I plan to enjoy every last second.

 Who knows what trouble I’ll get myself into tomorrow.

Sewing Adventures


This break has been a little on the boring side.

Granted, I am mighty thankful for the week off from school

but my school break are usually filled with all kinds of plans.

This one, for some reason, has fallen a little short.

Today I forced myself to make things a little more exciting

by taking a trip to the fabric store and sewing at Abuela’s.

I figured a little sewing inspiration might do the trick

of bringing this break a little sparkle of fun.

                   Kwik Sew Pattern 3513

I seriously have had this style of skirt in mind for weeks now

but I’ve left the fabric store empty handed a few times now.

Whether it be that I couldn’t find a pattern idea

or a knit fabric that I liked,

I wasn’t having too much success with this vision.

Today must have been my lucky day though,

because I found both my dream pattern and a cute fabric to go with.

Another sewing project all by myself goes in the books.

Abuela will be proud.

(She’s been out of town for a month now,

luckily I have the keys to the house just to use the sewing machine!)

Sorry I’m not including directions today,

but here’s a little slideshow of my sewing adventure.

This slideshow requires JavaScript.

Despite technical difficulties…

So my commitment to writing for a month

came to a screeching halt due to a little technical difficulties.

My internet connection was down all day Friday and Saturday.

Does it count that I thought about what I was going to write about?

I guess I could have written some posts on Word

and then posted them all at once right now,

but I guess I’m not that dedicated.

Anyway, a nine day streak is kind of a big deal for me and my blog!

Friday night I experimented with another Pinterest recipe

that definitely belongs in my library of party desserts!

It was DE-Lish!

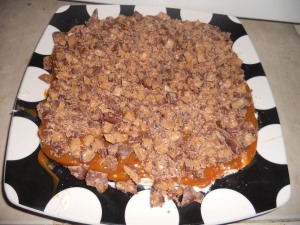
Carmel Apple Dip

Courtesy from Tasty Kitchen

What you’ll need:

-16 oz package of cream cheese softened,

definitely let it get pretty soft, it helps with the mixing later.

-1/2 cup powdered sugar

-16 oz tub of carmel apple dip,

I used Marzetti’s like the recipe suggested.
-1 cup Heath Bits-O-Brickle,

I couldn’t find these at SaveMart, so I bought a pack

of bite sized Heath bars and finely chopped them.

-4 Granny Smith Apples, thickly sliced,

I have to say that I bought 4 and it was NOT ENOUGH!!!

We were left with sad faces when the apples disappeared.

I definitely recommend about 6 or more apples.

3, 2, 1…

Step 1: In a medium bowl, beat the cream cheese

and the powdered sugar until fluffy.

Step 2:  Spread the cheese mixture on a platter.

Step 3: Spread the carmel sauce on top of the cheese.

(Sounds like I was having too much fun during step 2 and 3

because I totally forgot to take pictures.)

Step 4: Finally, top it all off with the toffee bits.

You’re done!

Enjoy this dip of goodness!

It’s fun for Fall, and your friends will love you!

DIY Throw Pillows

This happy little Saturday called for some sewing.

Today’s project – Throw Pillows.

Supplies:

2 18×18 pillows

thread

sewing machine

1 1/2  yd of adorable fabric

sewing needle

and a smidge of patience 🙂

Ready, Set, Go!

1.  I started by measuring out a “pattern” for the pillow

by simply plopping the pillow on the fabric.

2.  Then I turned the right sides of the fabric together and pinned the edges.

3.  Next I made a straight stitch down one side of the fabric.

4. I double checked where I wanted the second straight stitch

by measuring with the pillow inside the fabric.

After pinning it how it fit best, I added another straight stitch.

5. I pinned for the next stitch leaving 4-5 inches of space

 for me to stuff the pillow into the case, then made my final machine stitch.

6. Last step!  (Here’s where the patience comes in…)

I hand sewed the last few inches together.

And wha-lah!

Adorably cute throw pillows!

Sewing some Independence

My abuela is an amazing seamstress.

Most projects, she doesn’t even need a pattern.

Only a vision in her head.

She forced me into sewing lessons at the local fabric store as a preteen.

At the time, I can’t say I was too thankful or impressed.

After all, most young girls spend their evenings watching the latest hip TV show

or go to swim practice or dance lessons.

Not me.

I can still hear the hum of the sewing machines in the back corner of the store.

I can vividly recall the Troll fabric I chose for a pair of culottes.

(Oh boy, can you tell I am a child from the early 90s?)

I was capable, but I was never too impressed with any of my final products.

Nor was I thankful for this treat to know the tricks of sewing.

Years later, my gratitude shines.

Abuela and I have become regulars at our local JoAnne’s Fabrics.

She loves to boast and brag to the ladies

at the fabric counter about our latest idea for a project.

“I’m teaching her how to sew!  Isn’t that wonderful!”

She says to them practically every time.

(This is not a joke, nor an exaggeration.)

Though sometimes I blush in embarrassment,

I am proud to say that I am learning to sew my own clothes.

If you recall from my 30 before 30 list

one of my dreams was to sew something

on my own or with minor help from my Abuela.

There is one downfall sewing with Abuela.

Sometimes she ends up sewing the whole project on her own,

after-the-fact realizing she forgot to teach me.

Well, a few weeks ago she went on a 3 week long trip to Miami,

left me the key to her house and gave me a challenge:

Sew something without her while she was gone.

I have to admit, this was not a  quick and dirty endeavor.

Choosing the perfect pattern and fabric took one hour alone!

But after a morning of sewing, seam ripping, and sewing some more,

I had sewed my very own skirt!

This slideshow requires JavaScript.

I am also proud to share that I successfully altered

the pattern a little bit, by changing the belt waist!

Though I am also here to admit

that I lost my patience when it came time for the hem,

so I left it for Abuela to finish when she returned from her trip.

However, there was no greater satisfaction

than hearing her on the phone the day she came back.

“Gina, when I saw that skirt I was screaming!

 I couldn’t believe you did that all by yourself!”

Independence in Abuela’s eyes.  Finally.

The whole idea behind putting this on the list

was to prove to her (and to myself) that I can actually sew.

Well, here’s proof!

And another 30 before 30 item to check off the list!

May this inspire me to complete a few more before

I turn 28 in a few weeks.

sweet summer

I decided today would be a perfect day

to make use of that adorable pitcher I bought a few weeks back.

I’m on a saving money kick and I needed something to occupy my afternoon.

I picked some fresh lemons from the tree at my apartment,

used the fresh strawberries from my boyfriend’s aunt’s garden,

pinned a strawberry lemonade recipe,

and here we have it!

Sweet Summer Lemonade.

Ingredients needed:

-1 cup fresh lemon juice

-1 cup sugar

-2 cups sliced strawberries

Directions:

1. Combine the lemon juice and sugar in a blender and blend for about 30 seconds to combine.

2. Add the strawberries and puree or pulse until the strawberries are at the desired chunkiness.

3. Pour the lemon/strawberry mixture into a pitcher and add 4 cups of cold water.

4. Mix well and serve chilled. (Makes about 8 glasses)

So easy, right?

Mine turned out a smudge tart, but I’m okay with that.

Not to mention I only had 1/2 cup sugar in the cupboard,

but I had already started my Pinterest adventure!

 Off enjoying a glass of this summer treat!

And crossing yet another “Summer Bucket List” item off the list!

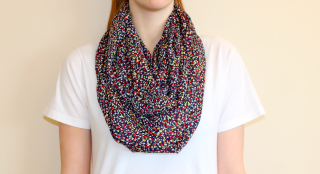
DIY: Circle Scarf

Have I told you lately how in love I am with Winter Break?


I’ve been baking up a storm, running A LOT, spending time with family, and my latest endeavor has been some DIY projects.


First Up: DIY Circle Scarf


If you’ve not yet experienced the amazingness of Pinterest you need to do so IMMEDIATELY!  It’s the greatest thing ever, filled with recipes, projects, teacher ideas, and more!


I found this easy project here.  You can also search “circle scarf” on Pinterest to see some other tutorials.  I liked the one I linked the best because it’s a video.


The video is a perrrrrfect tutorial.  I’d list the directions here, but it honestly helps to just watch the video because there are a few steps that can be confusing if you don’t watch what she is doing.


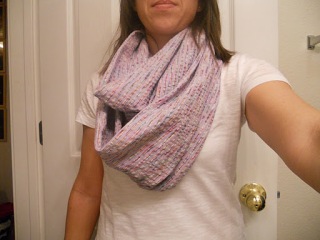
Be sure to pick a light but comfy fabric.  The fabric I chose this time was a little heavier than I would have liked, but it still looks pretty cute in my opinion.  Luckily I found another cute fabric to try that’s a little lighter for my second try. 🙂


Now, if you’re saying to yourself, “I don’t have a sewing machine!”  have no fear! I am proud to say I hand sewed this entire scarf!  It probably took me a lot longer than it would with a sewing machine, but I’m pretty proud of my hard work!


Check out the final product:


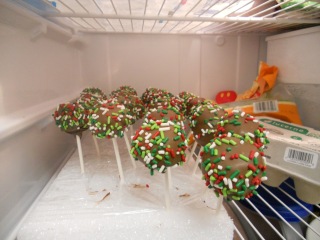
Cake Pops!

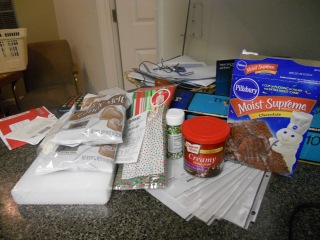
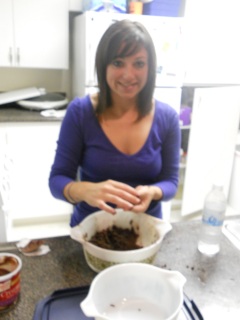
I’ve been dying to try this recipe for Cake Pops!


Take a look at my adventure! 🙂


 Success!! 🙂


I’d like to thank Little Miss Mama and her amazing recipe on her blog.  If you want to embark on the same adventure, see her step by step picture recipe!


Time to enjoy one of my pops now!


Adios!

Undercover Bribery – DIY style

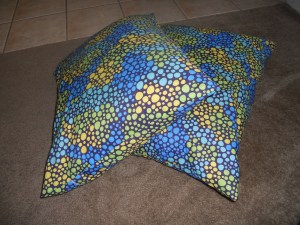
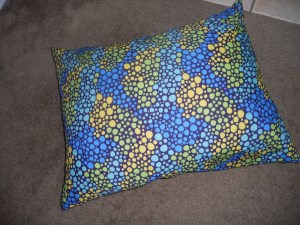
So this weekend, Abuela and I got together to do one of our “10 minute projects” to create some pillows for my classroom.  They’re fun; they’re comfy; and they’ll be used for undercover bribery to get my kids to read and work hard. 🙂

As you may remember, this fabric matches the bulletin board that I put together a few weeks ago for my student work.

I use the privilege to sit out of your own desk as a big bribery tool in my classroom.  Basically if you’re working hard, you just might get an invitation to work out of your seat for a lesson.  They LOVE it!  I’ve got all kinds of random areas the kiddos can be, but what they love most are the comfy chairs and now, comfy pillows! 

I’ve even started a new thing where we have a student of the day, “Bruin of the Day.”  If luck floats your way, and you happen to sit with that person in your group, you get first dibs on the pillows and cool chairs in the room (when it’s a time to work out of your seat).  They’re pretty obsessed with it.  Ahhh, the little things…

Abuela and I call this the “10 minute Project” because it really is.

What you’ll need:
3/4 yards of fabric for each pillow
thread
sewing machine (or inspiration to hand-sew the straight stitches…not that hard, I swear!)
pillows or stuffing for the inside

Here’s what you’ll do:
-Lay the fabric face down on the table.
-Fold left side a little more than half way across the center.
-Fold right side a little more than half way across the center to create a small overlap with the left side.
-Measure the pillow to ensure you have the correct measurements, then pin the edges.  You will not sew where you created your overlap so that the pillow case can be removable.
-Make a straight stitch on the top and bottoms.  Flip the cover right side out, and be sure to poke the corners out. 
-Stuff case with the pillow. 
-Ta-da!